Sunday, June 28, 2009

Birthday Month Giveaway!

** This giveaway is now closed!! **

Thank you, everyone, for helping me celebrate my birthday all month long! Don't forget to come back again later this week for another giveaway!

I put everyone's names into a box as I received your comments and yes, I have been shaking and mixing your names up well all month long! :)

CONGRATULATIONS TO PATTY W! Hooray!!

Patty, email me your mailing address and I will get this out to you this week.

Terri and Joni, your packages are also on their way.

xx

Jane


** REMEMBER ** Every week, I will be adding something new to the pile! Check underneath the pictures to see! **

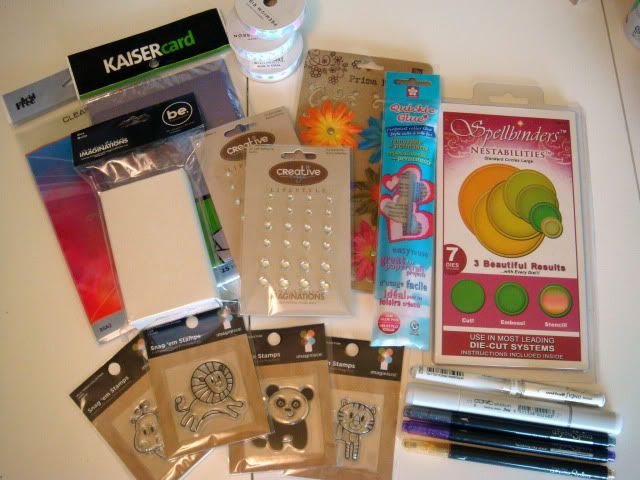
It's my birthday and I have some goodies to giveaway!
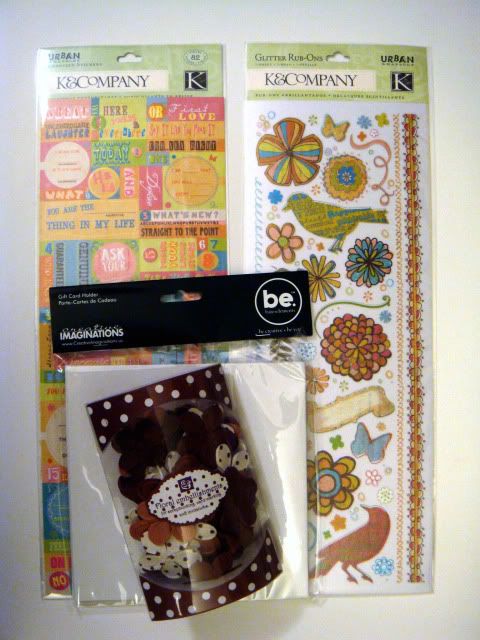
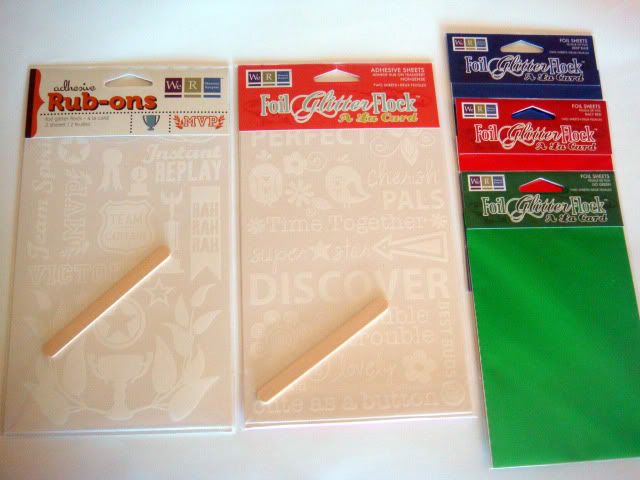
Some are compliments of Memories Live On (thank you Vivian and Mort!!) and some are from me. These are a few of my favorite things!

Here you go!
Photobucket
June 7th

Photobucket
June 15th


Photobucket
June 22nd


So... what do you think? Pretty awesome? See anything you would like to win?

Well, I love my readers. I have a new project coming up where I will be blogging for Memories Live On with the uber talented Irene Tan. I would love to get a head start blogging again and find my creative side... kinda lost it a little this month with the end of the school craze. Will you all help me?

All you have to do is be a follower (click on the left side). That gets you one entry to this giveaway! Leave me a comment here. That's another entry! Link me on your blog. That's another entry! If you don't have a blog, then just email a few of your crafty friends and send them this way (just have them refer you).

Then come back and visit me as I post more stuff!
Did I mention more goodies will be added every week? The more entries I get, the more goodies you get!

I will pick a winner randomly after 11pm, Sunday - June 28th.

Here's a sneak peek to what's coming up tomorrow!

Photobucket

Thanks to all of my friends who have encouraged me this far with this blog!
OH! I received a few emails worried about the music that used to be on the blog.
If you go to this post I explained why I took the music off and where it is now. Otherwise, just click on the "music" link that's on your upper left hand , under "Whoopsie Daisy Favorites". You will go straight to my Playlist!

Have a cupcake with me today!

hugs,


Friday, June 26, 2009

Stamp-a-ma-jig!

I met this really sweet girl in the rubber stamp aisle at the local Michael's who is getting married soon and she wanted to know if this Stamp-a-ma-jig was necessary or not and how it worked. I tried to explain how it worked but it's kinda hard to do that without really demonstrating it in person. SO... I told her to buy it and let me get a mini tutorial going on my blog and then she can decide for herself if it's worth it or not.

My two cents? It's a great handy tool to have... especially if you are particular about lining things up.

Some might remember that I have already done a Stamp-a-ma-jig tutorial. You can view it HERE. The stamp set that I used for that is slightly different in that I was trying to line up an outline stamp onto a bold stamp... or something to that effect. This tutorial is more for those trying to line alphabets across or in my case, initials.

Let's get started!

We have the "T" shaped tool which is the "Stamp-a-ma-jig" and it comes with an "imaging sheet". The tool is "T" shaped for left/right handedness. You can use the tool in any direction. I prefer to use mine with the "T" going upside down.

First thing is to line the "imaging sheet" flush against the corner of one side of the Stamp-a-ma-jig.


Photobucket


Just a side note here but the imaging sheet has two sides to it. One side is slick and the other side is slightly rough. Use the smooth side when using most "regular" ink pads. Use the rough side when stamping with other ink like "Craft". Regardless, I tend to use the rough side because I found that the ink likes to grab and hold better. The smooth side is a bit too slick for me and the rubber stamp tends to slide sometimes. HOWEVER, for taking pictures today, I found that using the smoother side made for a better tutorial because it was shinier! LOL!

Ink up your stamp and slide it down against the Stamp-a-ma-jig and flush into the corner. Press down firmly onto the imaging sheet and then pull straight up. Now you have a "copy" that you can use to decide where to stamp on your project.


Photobucket


Take the Stamp-a-ma-jig away and place your imaging sheet where you want that stamped image to go.


PhotobucketPhotobucket


Line the Stamp-a-ma-jig up against the imaging sheet EXACTLY the way you had it the first time you stamped it onto the imaging sheet.


Photobucket


Take the imaging sheet away. Keep one hand on the Stamp-a-ma-jig while you ink up your stamp and then carefully slide the stamp against the tool and into the corner. Press down firmly onto your project and lift straight up. Voila! You should now have your perfectly placed stamped image!


Photobucket

Photobucket

Photobucket

Photobucket


Repeat for the next initials:


Make your template:

Photobucket


Place it where you want to stamp:

Photobucket


Put the Stamp-a-ma-jig back in place, remove imaging sheet, ink up stamp and press:

Photobucket


AGAIN...


Photobucket Photobucket Photobucket Photobucket


I can't leave a project unfinished, so I'll show you a quick and easy way to decorate this envelope. Here I am masking the front of the envelope with some Tim Holtz mask. Aren't these masks beautiful? I love them! So much so that I am adding one of these packages to the birthday giveaway!! :)


Photobucket

Photobucket


I took a sponge and used it to sponge in some colors over the mask:


Photobucket


Photobucket

I added some TH Distress Ink Tea Dye to the middle area and then peeled the mask off.

Photobucket

I will be off the computer until Sunday... will back late Sunday night to draw a name out of the box that is holding all of the entries for my birthday giveaway. Can not wait to find out who the lucky person is!!! I can not believe that I won a blog candy today! I did!! HERE! Thank you, again and again, Julie! Those of you who say "I don't ever win"... well, there's always hope! :)

xx


Thursday, June 25, 2009

Pink Cat Studio wrangling Weiman donations for Make-A-Wish Foundation!

Now this is something that really touches my heart.
Y'all know how much I love Pink Cat Studio.
In the past, I have posted for a few families that have been going through chemo so this story about Ethan Weiman moved me deeply. Little Ethan passed away on June 12th from Neuroblastoma cancer. Ethan was a true cowboy and loved horses, balloons and Knock Knock jokes.

Well, so the story goes like this...
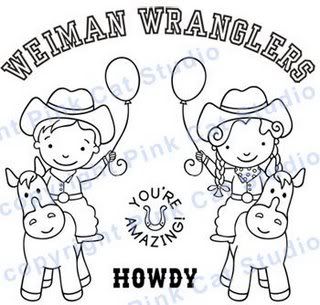
Lauren Meader contacted Melissa of Pink Cat Studio (who was in the midst of moving!) and together with the design team and My Time To Create team, they came up with this super cute NEW Digi Stamp release "Weiman Wranglers":

Photobucket

That's right! DIGI Stamp means "digital" download... NO shipping, NO storage, and INSTANT gratification! All for a worthy cause: Make-A-Wish Foundation. By purchasing these digital stamps you will help brighten the day of a sick child as the money raised will go towards making one of their dreams come true.
Click here to purchase: WEIMAN WRANGLER

Here's what Melissa posted from Pink Cat Studio:
"Last week Lauren Meader, a member of my DT, contacted me to ask if I could make some digi stamps to help raise some money in order to honor Ethan and the Weiman family. I thought that was such a wonderful idea and got right to designing. Lauren told me that Ethan loved my Cowboy Billy stamp so she suggested that I design a new Cowboy stamp for Ethan and one for his little sister Ava too. Ethan loved horses and balloons so that is how we came up with the design of the kiddies riding their horses and holding a balloon.

We would be so grateful if you would help us to raise some money in Ethan’s honor. All proceeds from the sale of the stamps, after Paypal fees are deducted, will go to the Make-A-Wish Foundation of Illinois as requested by Alicia and Dave Weiman. "


Want to win a Pink Cat Studio gift certificate or three??

Lauren Meader, Vicki Garrett and Heather Schlatter are all generously offering the chance to win some moola to buy PCS stuff. Lauren's is a card making challenge using the new digi stamps and Vicki's and Heather's involve helping to spread the word about our fundraiser. Thank you so much ladies for your generosity! Please visit Lauren's, Vicki's and Heather's blogs to read about how you can win.

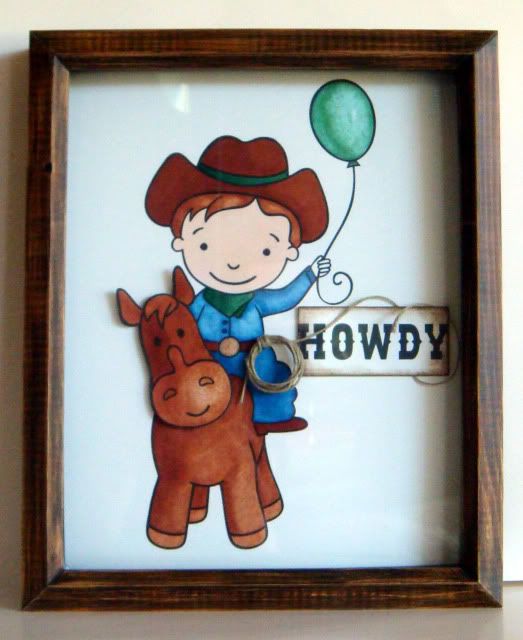
Here's what I came up with...

Photobucket

I worked on this all night long, thinking of ways I could make my "mistake" work. What mistake? Well, I accidentally printed the cowboy on my Gina K Pure Luxury cardstock in FULL SIZE! Yikes! lol! Then I looked at him and the shadow box idea popped into my head.

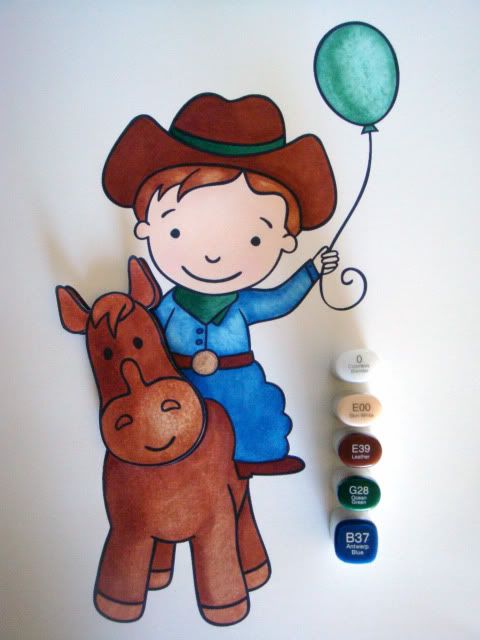
I have been wanting to show you how easy it is to color an image with just a few Copics. I have had students in my classes at Memories Live On ask me what colors they need to start with and comment on how they are holding off on starting because of how expensive they are. I always tell them that they don't need a set of three for every color if they can't afford it. Seriously!! Why not color with just one and shade with the same color? Then use the "0" Blender to get another shade from it? Not making any sense? Take a look...

Photobucket

What do you think? That's right! Three colors plus the skin color and the "0" Blender. :)
Photobucket
The horse's head is popped up for a 3-D effect.


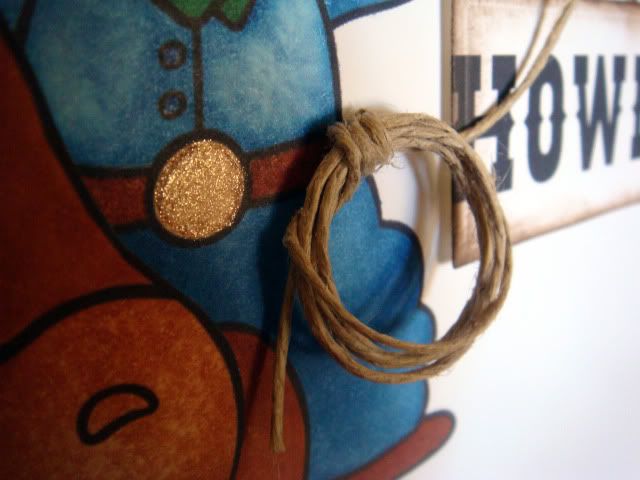
I used E00 and Copic atyou Spica (Sand) Glitter Pen on the round buckle. The "rope" is hemp twine.
Photobucket

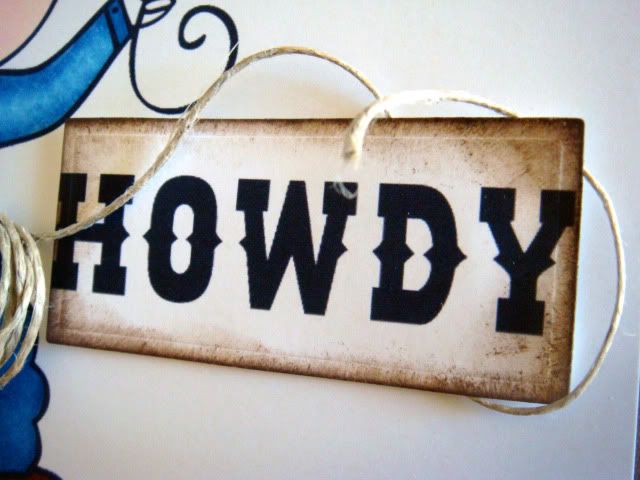
Then I wrapped the end of the "rope" around the "Howdy" sign, which I had distressed with a sponge and TH Walnut Stain.
Photobucket

Now it's your turn! If you have already purchased this Digi Stamp release and have made something with it, then post your link here! I would love to see your creation!

Are you a member of Paper Craft Planet? Then be sure to upload your project to the Ethan Tribute Album, created by Susanna Boyd!

BTW, the last time I checked, it says that $1381.59 has been raised at Pink Cat Studio so far!! Way to go, crafty wranglers!!

xx

Tuesday, June 23, 2009

Copic Markers with Cuttlebug Embossing Folders

How about trying your Copic markers on your Cuttlebug embossing folders to add a colorful layer on your cards or scrapbook layout?

Photobucket

If you have not seen the original post for this card, please check it out! "100 Birthday Cards" This card is a birthday card for a soon-to-be Centenarian (Beatrice) and I am collecting birthday cards for a blog follower (Amy) from Canada. Please join in on the fun!! I have received emails from several readers already and am so excited & grateful for the support. Thank you!!

Now, I bet you are wondering how I managed to color up a Cuttlebug embossing folder with Copics and get it to transfer onto my white cardstock! Well... here you go!

Photobucket

I colored my Floral Fantasy Cuttlebug embossing folder with several Copics markers. I colored the raised side of the embossing folder. It takes some time to color the entire folder, but once you get started it goes by fairly quickly. I used the brush end of my Sketch markers.

Photobucket Photobucket

Photobucket

For the next step, I filled my Mini Mister with Colorless Blender refill and spritzed it on Bazzill Coconut Swirl cardstock. If you see a puddle sitting on the cardstock (like in the picture above) then simply use your fingers to move the puddle around on the cardstock, allowing it to soak into the fibers evenly. Wait until the "sheen" disappears and the paper is damp but not soaked. If you do not own any Colorless Blender refill, do not give up! You can use your "0" Colorless Blender marker to "wet" the cardstock by swiping it back and forth until the cardstock is damp.

Photobucket

Place the cardstock into the embossing folder while it is still wet and run it through as normal. Isn't the effect pretty?

PhotobucketPhotobucket

Coloring with your Copics on your rubber stamps is something I posted back in February. You can view it HERE. It's one of my favorite techniques! Just a quick review... 1) Color your rubber stamp with your Copics 2) Dampen your cardstock by either misting it with the "0" colorless blender refill or running your "0" colorless blender marker over the cardstock a few times 3) Stamp on the slightly damp cardstock. I think it's easier to understand when you see it, if you haven't done this before. Just click on the link and I have some pictures that might help.

The edges? Oh yes! I airbrushed the edges with my Copic marker. Then I went over the stamped image with my Copic atyou Spica pens for some glimmer. Fun stuff, ladies!

xx

Sunday, June 21, 2009

100 followers! 100 birthday cards!

Before I get started this week, I just wanted to thank those who emailed me wondering if I was okay. I'm fine. My father was rushed by ambulance to the ER last week with what they thought was a stroke. He had a liver transplant over 3 years ago and his liver is now having some problems. Toxins seeped into his brain, which caused stroke-like symptoms to appear. He is doing much better now. I did take a week off without notice from here and I'm very sorry the blog was neglected.

Whoa! I just looked over and noticed that I have over 100 followers on my blog. I just thought that was pretty neat, considering what I am about to post next.


Just on a side note, I wanted to mention something that's been on my mind. I've been posting blog candy links and noticed an increasing amount of "must become a follower" rule in order to qualify for a giveaway. That kinda bothers me a little. I am posting some of them because they are unique. Just to clarify... you don't HAVE to follow my blog in order to qualify for my giveaways. EVER. My birthday giveaway is a little bigger than my normal ones so I wanted a way for everyone to get more entries. This was just one option. That's all.


I was asked by one of my readers if I would be interested in helping her friend's grandmother celebrate her 100th birthday by sending in a birthday card. Amy and Karen are trying to get 100 birthday cards together to give to Beatrice in September. I thought I would do better than send in just one card. I have a few followers... perhaps a few of you might join in on the fun?


Here's the card I whipped up for the Beatrice:


Photobucket


I used Copic markers to color my Floral Fantasy Cuttlebug embossing folder. I will post the tutorial on how I did this on my next post. I thought I would link the tutorial to the store's new blog but it's not ready to go yet. You'll just have to wait until July! :)

Now here's what Amy wrote to me:


Centenarian Card Drive For Bea : Goal is 100 cards

My girlfriend's grandma will be turning 100 years old this September 2009. "Beatrice" or "Bea" is what grandma goes by. One day she was telling my girlfriend (Karen) that, "I think I just might make it." When my girlfriend was telling me this, I had mixed feelings. On one hand it was kinda weird just the way grandma Bea put it. It seemed like she thought her end was near. But know that grandma Bea is healthy and going strong, which is why we think for sure she's going to make. Not many of us live to be 100, so of course we wanted to do something special. I came up with the idea of a card drive, hoping to get 100 cards. Just think of the reaction she would have when she sees so many different cards from so many people all wishing her a 'Happy Big 100!' Big WOW factor.


Karen's dad is writing to the Queen or I guess I should say write to her office. He found out that if any Canadian citizen turns the big 100, they get a letter/card signed by Queen Elizabeth herself. Another WOW factor. There's going to be a big celebration for sure and we just want to do our little part in giving grandma Bea some lasting memories of her big day.


I will be collecting the cards from now till September and then package them all up for the big party. We decided on this so Karen's mailbox doesn't get bombarded with mail and so the card drive can stay hush hush. No one knows except Karen and I. It'll be a surprise for everyone. It'll be great. Please if possible include a personal hand-written birthday message in the card. I'm sure Bea would love to read your special message. THANKS SO MUCH.


Take a look through your stash of cards! Are there any birthday cards from swaps that you can spare? Any CAS cards that you can whip up? How about an extra special card just for Beatrice from you? Whatever you want to do would be awesome! Please join me in celebrating this milestone birthday.


My great-uncle Harry just celebrated his 102nd birthday this past December. It means SO much to these Centenarians.


You have a choice to mail directly to Amy in Canada or mail to me here in the U.S.


Either way, email me at whoopsie.daisy@sbcglobal.net for an address.

I will be collecting all cards for Amy and sending one envelope at the end of August.


Deadline: end of August to me / beginning of September to Amy


xx


Monday, June 15, 2009

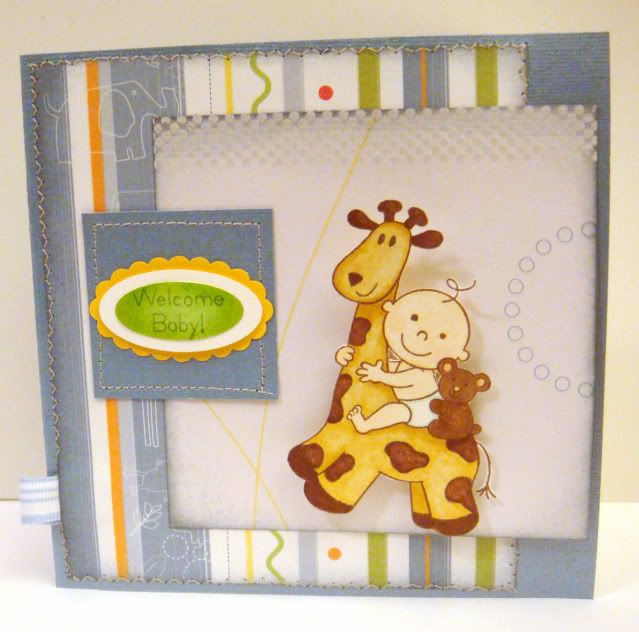
Welcome, Baby Parker!

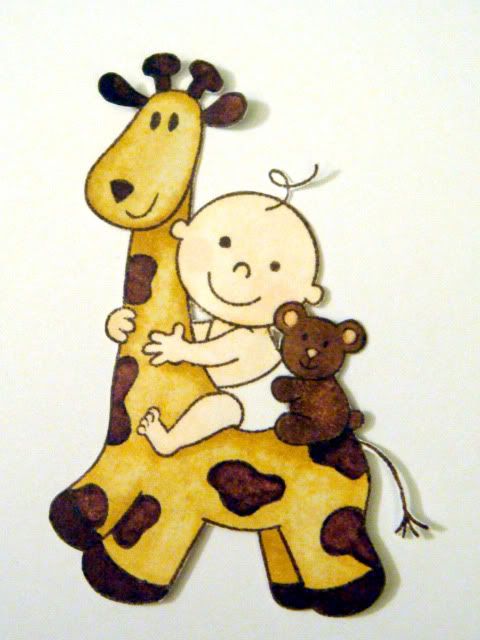
Remember this Sweet Pea that I had colored the other day?

Photobucket


When I first saw the image, I immediately wanted to see how I can get it to "rock" on a card.
Oh, I'm sure it's been done before or there's another way to do this. Here's what was in my head...

Photobucket
Photobucket

Here's how I did it...

Photobucket

On the back of your image, add a dimensional (pop-up) dot, a penny, then a second dimensional (pop-up).

Then send it through a hole. I made this hole by paper-piercing where I wanted it to be and then using my scissors to create a small hole. Poke dimensional through the hole.

Photobucket
Photobucket

Add the second penny over the dimensional to hold everything in place.

Photobucket


Here is the final card... it's for Ashley. She delivered a baby boy!
Congratulations, Ashley!!
Welcome, baby Parker Alan Newell born 6.13.2009 at 11:21PM PST. 8lbs 15oz, 21"

Photobucket

Photobucket


Photobucket

*Grin* I LOVE Pink Cat Studio!


Don't forget... I am adding new goodies to the pile every week for this month's Birthday Giveaway! Check in my first post for the latest update!

xx