I haven't been near my craft table except to try to organize, only to make more of a mess. *sigh*
Anyways, I had this in my head all night long and finally got an hour to be able to put it together!
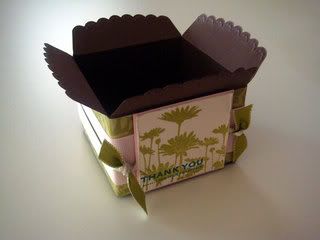
I don't know if it's already out there or not... I think it's a really nifty box and I hope you like it!
It's super easy to put together!
Let me know what you think!
Here's the Scallop Envelope after I ran it through the Big Shot:

You will need 4 of them.
It's best to use Scor-Pal tape to attach the tabs to each other, scallop side up. I have used snail adhesive but it doesn't hold the box closed and it will fall apart eventually.
It's easier if you bend the tabs down and attach fold to fold to get that perfect alignment.
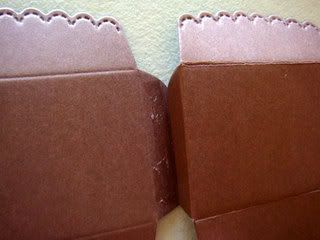
All in a row! Just attach the end to the other end and you have a cube!
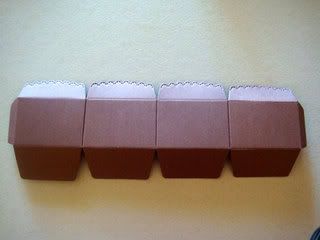
You can leave the panels flat like the picture above or you can attach the end tabs together and get a set of panels, two together, like the picture below.
Flatten to adhere the DSP 2-3/16" x 12"
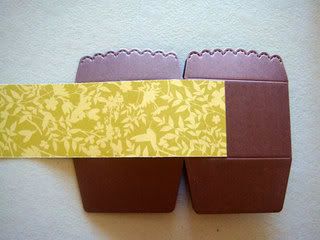
Flatten the opposite direction to crease all sides of the DSP.
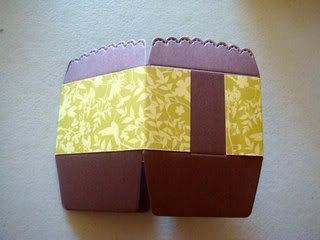
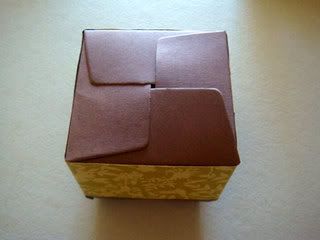
Turn over and fold in the bottom, one on top of the other. Tuck the last end under and it will hold nicely. I lifted each loose end and added double sided tape (glue dots work great) to each tab to secure them down. I did the same with the long tabs along the inside of the box. I don't think it's necessary, but I did it anyways... it looks nicer.
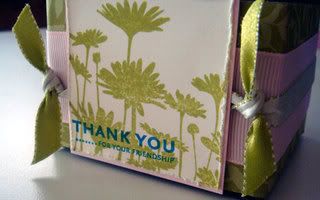
Decorate the front and add some ribbon...
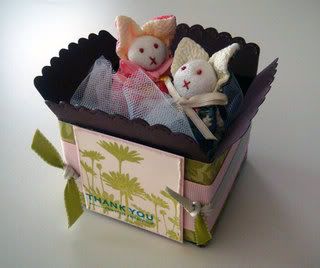
Add a little treat inside...
Happy stampin'!
Jane


42 comments:
Jane, that's a brilliant idea! Is the scallop envelope a sizzix die? I love the cuties inside the box too. :)
Welcome back Jane. Sure missed your inspiration! Cute ideas as always.
Janet
Oh, my goodness! What a fantastic idea! I will have to try this! :o)
This is so adorable. What a great idea! Thanks for sharing.
Betsy
That is awesome! I love seeing what other people do with the same products! TFS!
Wow, that is so cute!!!!! Is that a new die?? So adorable!!
PS- Thanks for the belated birthday wish! :)
Oh how fabulous! You're so clever to figure this out! I can't wait to try it out.
Wow! Great tut! Thanks so much for sharing :)
Jane, this is as sweet can be! Missed your amazing tutorials and this is no exception.
I understand you might be at Jana's on Monday...I really hope I'm up for it. I'll keep you posted if I'm able to make it and maybe we can commute over there together. Hugs!
Wow...you are too creative!! I never would have thought of this! A-D-O-R-A-B-L-E box!! And you did it in my favorite color! Just fill it with some See's next and let me drool...:) or some Wednesday Wendy's! LOL
Oh my Goodness Jane....how stinkin' cute!!!!!!!! LOVE it!!!
Wow, this is fabulous! I love your creativity!
I had absolutely no use for that die... until now! Thanks a bunch.
Darling box!! Beautiful color scheme. Thanks for the tutorial!
Thanks, too, for visiting my blog and leaving me such a sweet comment. ;)
BTW, I like your blog music! Fun place to hang out.
Aww...that is so cute!
So amazed at your ingenuity! You're awesome!! This couldn't be cuter! Glad to see you're stampin' again! TF the inspiration... Darn it, now I might have to buy that die ;)
How clever!!! I thought that envelope was too small to be practical, but I love what you've done with it! What a great way to use your tools to the max! Love it!
Cindy
That is the cutest box ever! You have the greatest ideas! TFS and welcome back to the blogging world! I missed you!
I love your box!!! I was working on this die to try to come up with more uses for it. I had a similar (admittedly not as cool) idea. I will post along with use of other dies here late You rock for making this one come to life in such a new way!!! Thanks!
Love, love, love this. So cool! I sure wish I had that die. Now to look for it.
Thanks for sharing! So FUN:)
I just saw this on Splitcoast, and I love it! Thanks for sharing! I'm looking forward to trying it and will hopefully post a pic on my new blog soon.
http://amateurstamper.blogspot.com
Blessings,
Carrie
Wow! Awesome! Love your little box!
Connie
www.inkspiredtreasures.com
Wow, what a wonderful project! Thanks for sharing your inspiration with us! It's great!
The box is so adorable. Thank you for your creative sharing and the most peaceful listening music to stamp by.
jann
Fabulous box!!! Thanks so much for the inspiration :)
You are ingenious!! I just found your site and I love it!! What a easy and fabulous gift box - thanks so much for sharing pictures and instructions too - I plan on coming back to visit!!
One of my GF's introduced me to your blog - all I can say is Wow! I love your projects and this box is really cool. Hope you don't mind if I case this? I bought the die and didn't do a thing with it! aloha, Teri
Jane, this is pure genius, and stunning to boot! LOVE IT! I've nominated you for a couple awards over on my blog, stop by when you have time!
What a fabulous idea! I may have to get this die after seeing this cute little box!
SO cute! Thanks for sharing!
Cristina
What a great idea! I don't have a die cutting machine, but this is a good reason to get one. Thanks for the great tutorial!
Thank you for this amazing idea!
that little scallop box is just adorable! I will be using it asap, thanks for sharing! Jan
What a waaaay cool idea!! This is awesome!! Thanks for sharing!! ;)
This is outstanding! TFS the tutorial
I made another of these that will be on my blog tomorrow! Thanks again for the great tutorial and idea!
Has it been almost a year since I started drooling over this? Take a peek . . . I gave you a shout out today and tried my own.
http://www.stampinpretty.com/2009/07/scallop-envelope-box-tutorial.html
Hugs, Mary
Good day!
I am new to this forum and look forward to making some new friends
big respect, Dennis from [url=http://www.myonlinepayday.com]My Online Payday[/url] website!
It is extremely interesting for me to read the post. Thanx for it. I like such themes and everything connected to this matter. I would like to read more soon.
Jane Kuree
african escort girls
Pretty nice post. I just stumbled upon your blog and wanted to say that I have really enjoyed browsing your blog posts. In any case I’ll be subscribing to your feed and I hope you write again soon!
Thank you for your fantastic work and inspiration Jane. You certainly inspired me with this and I have used this fabulous box format as you can see here..... http://thecraftspa.blogspot.com/2011/04/easter-bunny-punch-art-box-or-owl.html.
THANK YOU SO MUCH and I will be making these boxes again and again and....yes, again.
Hey - I am really delighted to discover this. Good job!
Post a Comment