Let's get started!
Start with a piece of cardstock trimmed to 4-1/4" x 11"
Score it at 3", 5-1/2" and 8".
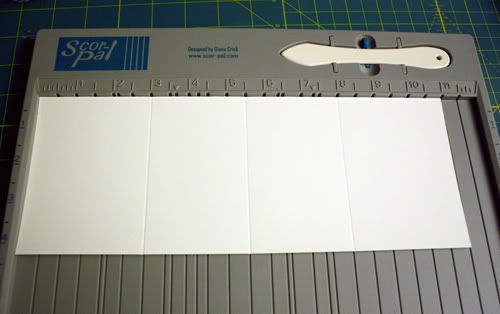
Fold your scored cardstock in half at 5-1/2"
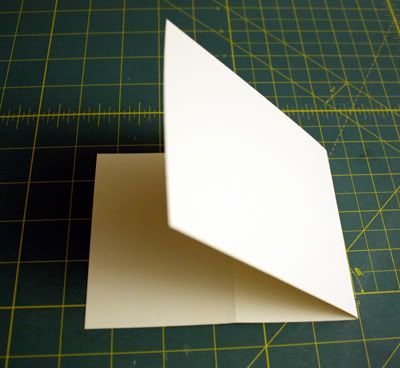
Fold one end at 3" up and over the middle
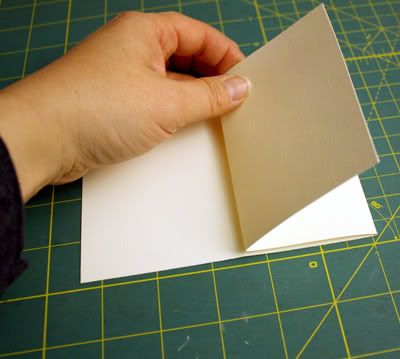
Flip over and fold the other side in the same way
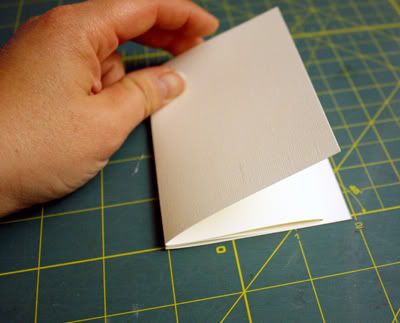
Open up and grab the inside fold.
You should be able to see the gift card holder starting to form.

You will need the Word Window punch to create the slot across the middle center for your gift card. The 1-3/8" circle punch is optional.
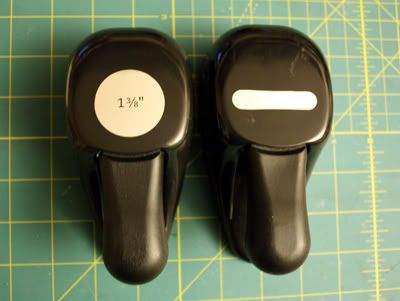
Take the Word Window punch and start at one end of the inside of your gift card holder.
Start about a 1/4" in from the end and punch once.
Move the punch over until you are 1/4" in from the other end.
Punch.
My sample shows that I started in a lot more than usual. I went back after taking the pictures and punched off a little more from each end because my gift card could not fit into the slot.
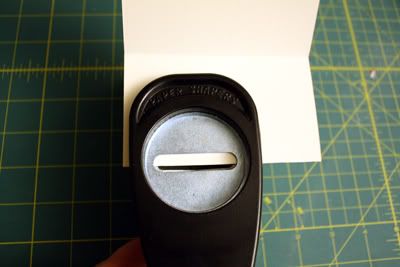
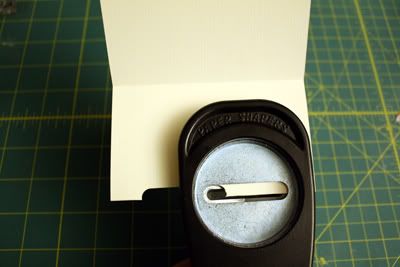
Again... 1-3/8" circle punch is optional.
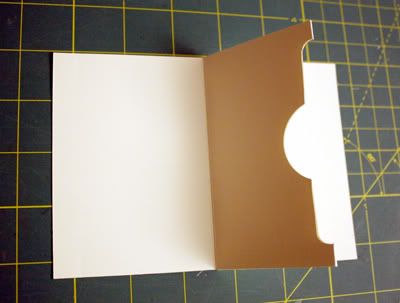
If you choose to use it, this is what it looks like:
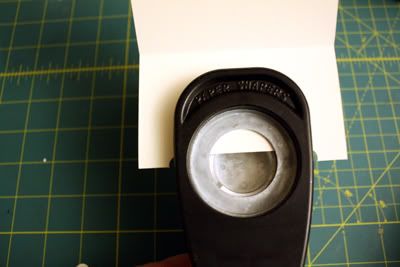
After you are done punching, it should look like this:
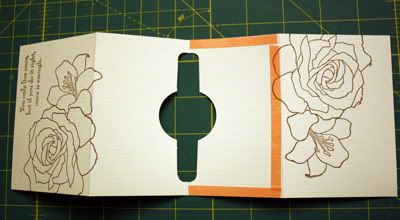
I like to stamp first and then I add my sticky strip tape in the very middle of the gift card holder.
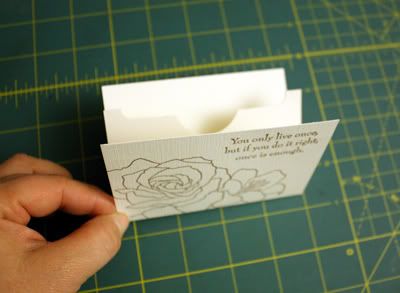
Add the gift card and tie it closed with a ribbon or use a scrap of 1" x 12" cardstock to create a wrap around the gift card holder.
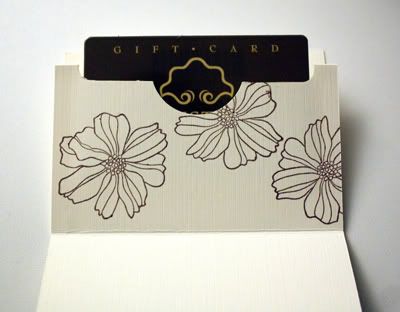
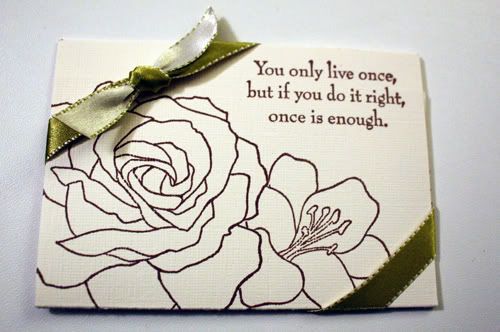
Now you try it!
Let me know if you have any questions!
~ Jane


19 comments:
Great tut Jane! I've made those before and you are right...they are easy! :o)
Fabulous Jane....Love what you've done!!
Thanks Jane, it is just what I was wanted. to make. The tutorial was very easy to follow! Great Job.
I have never seen this before! It's soooo cute! I'm definitely going to use this idea... I send gift cards a lot!
Love your tutorial! I love that stamp set too!! TFS!
Wonderful tutorial, Jane! Love your GC holder!
Really cool!!! Thanks for sharing!
:-)
Absolutely gorgeous!! What a wonderful way to present a gift card!
Hi Jane! What a great tutorial. I love this type of gift card holder. Thanks for all the details.
this is amazing! What a fantastic tutorial, Jane! Thank you!!! smiles...
BTW, I love your music too!
Brilliant! I have enjoyed viewing your blog! Your tutorials are awesome, detailed, & are easy to follow! Thank you!
Thanks for the tutorial...I just received this stamp set today, and I can't wait to use it! Keep on blogging!!
Hi!
Today I posted an entry on my blog with a link to this tutorial.
Would you let me know if that's OK?
Thanks,
Nancy Ward
http://paperfriendly.blogspot.com
Aww, this is great, I want to make one!
Thanks for sharing :)
Alex from England x
i LOVE this gift card holder! thanks so much for the tutorial...glad I found it. :)
I was surfing the web looking for a pop up gift card tutorial and yours is just perfect. My father-in-law eats at Dairy Queen a LOT, so he's getting a hefty gift card from there. The little holder it came in looked cheesy, so I'm going to knock his socks off with one similar to yours.
I will make it Chistmasy. Thanks so much for a great tutorial with great photos and directions. I have that stamp set too, so will use it in the future.
awesome holder! Thanks for the tutorial!
Popped by from Reasonably Priced Ribbon to read this - what a brilliant idea for a gift card holder. I'll be having a go at making one.
I love this idea! So sweet and simple. Thanks for sharing!
Post a Comment