Tuesday, April 22, 2008

Going Green! Celebrating Earth Day

I thought I would celebrate Earth Day in my own way by posting a few of my favorite green products that I love to use. Then you can share some with me!

Re-useable bags:

So I always knew that plastic bags were not good for the environment but it didn't dawn on me that paper bags were equally bad for our Earth, since they take our trees away. Well, DUH! So I have been doing some research. I found this website and will be ordering some bags from them, especially with my oldest starting elementary school in the Fall and will be needing a lunch bag eventually. Ken thinks these are the greatest! Built NY Munchlers. I was checking these Pack-N-Tote Grocery Cart Helper bags.

I will be going to the grocery store tomorrow and buying several totes for a few dollars each. I will keep a couple in my trunk at all times and rotate them so that I will never be without! Thanks, Theresa! I think Target has some bags as well. Trader Joe's too.

Bath / Body Products
Serendipity Bath Co.
Ashley and Tiffani make the most heavenly bath soaps, sugar scrubs, and whipped shea butter! 100% natural Simply Soap line is made from all vegan ingredients. Wild Child line is phthalates, parabens, laryl sulfates free.

My favorites?
Whoopsie Daisy! - I don't see it online any more! :(
Brazenberry
"Gimme Some Sugar!" Body Scrub
"Body Bling" Whipped Shea Butter

Burt's Bee Products are paraben and sodium laurel sulfate free.
My favorites are:
Replenishing Lip Balm with Pomegranate Oil
Orange Essence Facial Cleanser
Almond Milk Beeswax Hand Creme
Baby Bee Buttermilk Lotion

Soy Candles:
I know this very talented girl through bowling in local Japanese bowling tournaments over the years. I just love her soy candles. They are fragrant and last a long time! I received one at a bridal shower and had to hunt her down at one of the local boutique shows for more. Check out what else she has to offer! R M Creations

Getting rid of plastic water bottles!
Brita!
I think it's time to get a filter for our faucet.

If you are not into buying organic fruits and veggies, I have found a fruit & veggie wash that is quick and easy to make.

1 cup water
1 cup distilled white vinegar
1 Tbsp baking soda
about 20 drops of Grapefruit Seed Extract

I saw this on Oprah today. Be forewarned that when adding the baking soda, it will rise quickly so prepare this in a large bowl! lol! After adding the drops of GSE, pour the mixture into a spray bottle and you are good to go. Spray onto your produce and leave on for 5 minutes. Rinse off. Quite a bit of pesticides and such will be taken off with this wash.

Now send me some of your favorite GREEN products and ideas!

Try This! Tuesday Techniques - Stamp-a-ma-jig

Ever wonder how you could get the perfect image placement when you are two-step stamping or shadow stamping? How about when you are trying to stamp a word across the page in a straight line? How about a mirrored image?

With a Stamp-a-ma-jig, all this and more is possible!
You can even go back and stamp over an image that was stamped unevenly!

Photobucket

For the tutorial, I will use Basic Gray when stamping with the Stamp-a-ma-jig so that you can see it well.

Photobucket

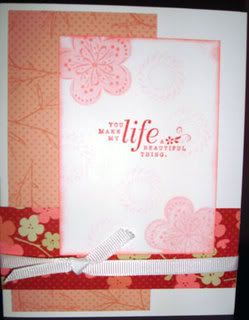
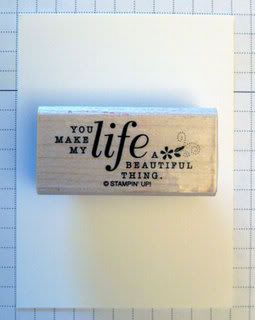
Stamp set: A Beautiful Thing
Ink: Ruby Red, Pretty in Pink, Cameo Coral, (Basic Gray)

First thing you want to do is to create the stamped image on your imaging sheet (shown here). The imaging sheet is a square plastic sheet that has two sides. One side is smooth and the other is textured. I use the smooth side with my Classic Ink pads. I use the textured side with my Craft ink pads and waterproof inks.

Line up the imaging sheet up against the handle.
Photobucket

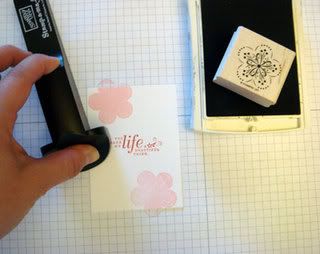
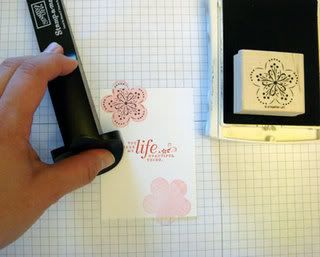
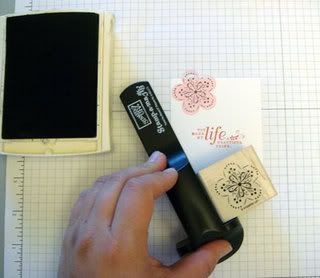
I inked up the outline stamp in Basic Gray (any dark color will do so that you can see the image on the imaging sheet) and slid the stamp against and down the handle until it was flush tight against the corner of the handle.
Photobucket

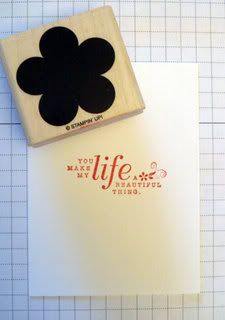
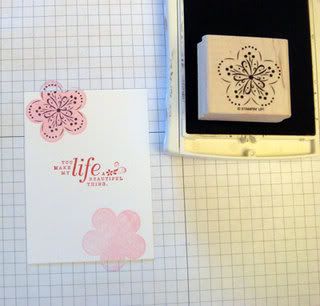
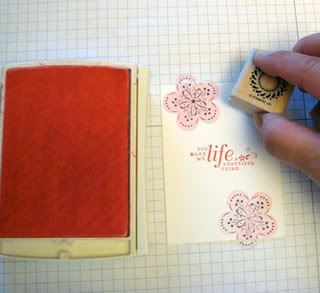
Next I added a tiny bit of adhesive on the back of on my Whisper White card stock to keep it from moving around. Then I stamped my word stamp in Ruby Red.
Photobucket

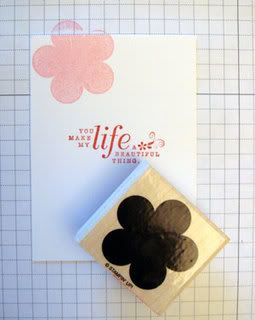
Then I stamped my bold stamp in Pretty in Pink.
Be sure to note where the bottom of your stamp is as you stamp, since your outline stamp will have to be held in the same way.

Photobucket
Photobucket

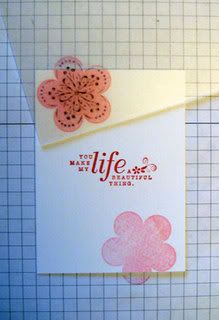
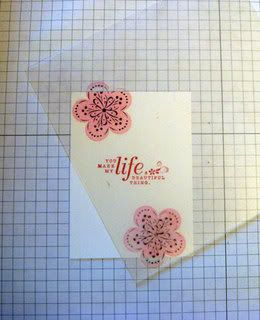
Take your imaging sheet with the outline stamp already stamped on it.
Place the image over the stamped image on your card stock.

Photobucket

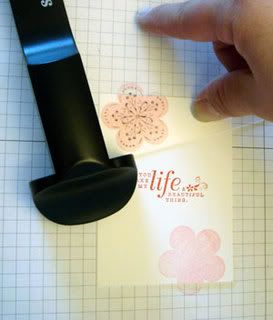
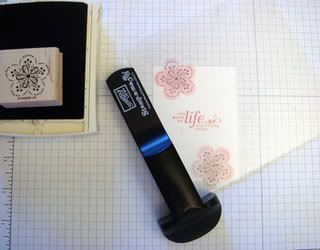
Line up the handle against the imaging sheet.
Photobucket

Carefully hold the handle down in place as you take the imaging sheet away.
Photobucket


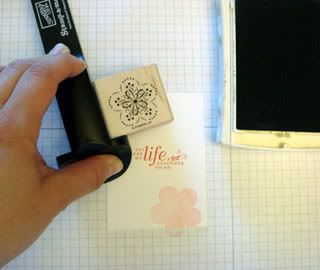
On the original card, I inked up the outline stamp in Cameo Coral and stamped that over the Pretty in Pink bold stamp. However, for you, I inked up and stamped the outline stamp in Basic Gray so that you can see the image. Be sure to bring the inked stamp up against the handle and slide it down the handle until it is flush against the T-handle - then stamp down.

Photobucket
Photobucket
Photobucket

Repeat again for the second flower:

Photobucket
Photobucket
Photobucket
Photobucket

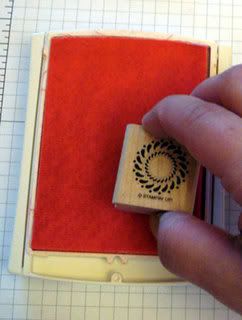
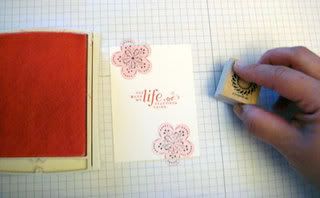
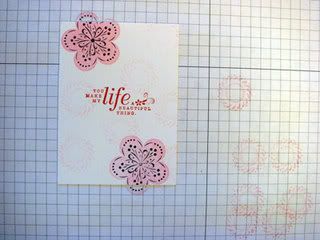
Then for the final touch, I inked up the small accent stamp in Pretty in Pink and stamped off once each time before stamping on the Whisper White card stock - creating my own background without interrupting the stamped images.
Photobucket
Photobucket
Photobucket
Photobucket

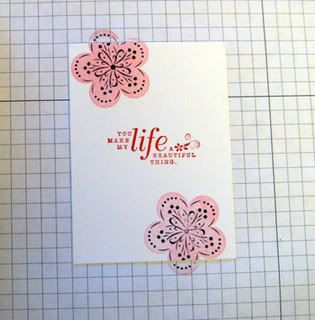
Final card:
Photobucket

Let me know if you have any questions!
I hope this helped!

Happy Stampin'!