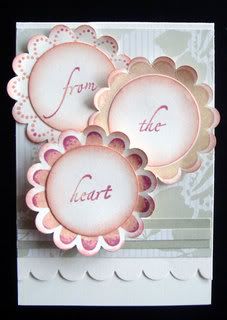
I made this card for my dear friend, Carolina, whose grandfather passed away on Saturday.
I used the "Rock and Roll" technique.
It's a technique I use all the time. It's so quick and easy to do. All you need are at least two colors to work with.
Always remember to work with your light colored ink pad first!
You do NOT want to get dark ink stains on your light ink pads!
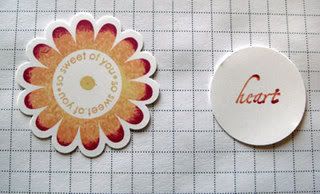
I will show you how I made the flower in the front with the word "heart" on it.
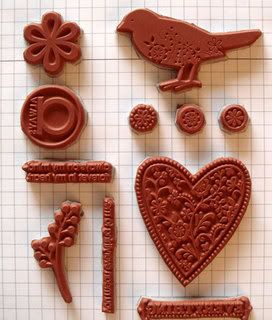
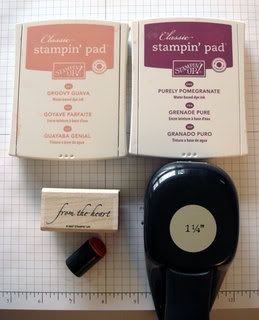
Stamp set: Holidays & Wishes
Ink pads: Groovy Guava, Purely Pomegranate
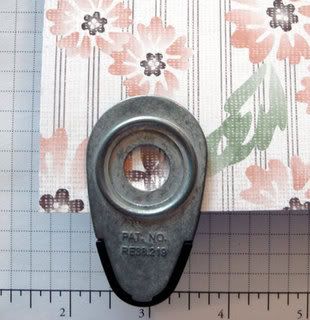
Punch: 1-1/4" Circle Punch
Accessories: Sponge Dauber
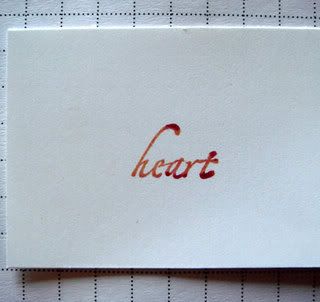
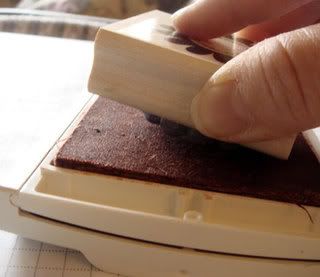
I am just inking up the word "heart" so I bring the word up to the edge of the lightest colored ink pad (Groovy Guava) and ink it up.
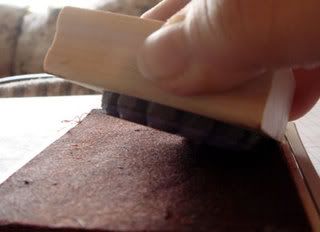
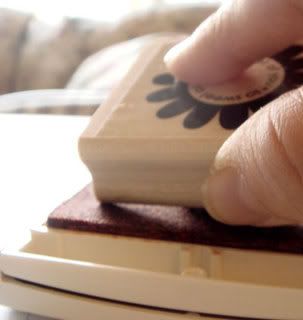
Then I carefully rock the edge top, side, and bottom of the word in the darker colored ink pad (Purely Pomegranate).
Stamp to see the pretty two-toned image you get with this simple technique.
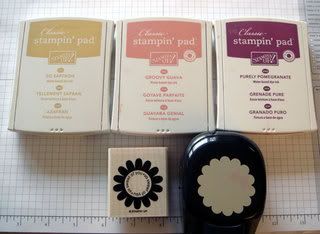
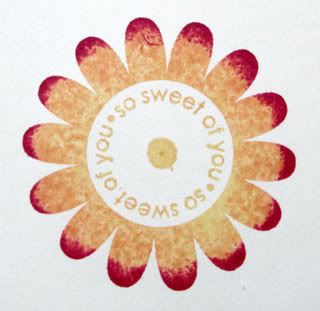
For the flower, I used three colors.
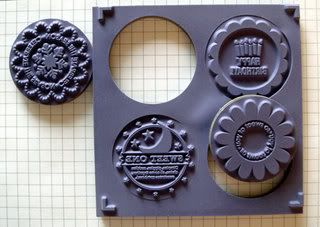
Stamp set: So Many Scallops (Sale-A-Bration)
Ink Pads: So Saffron, Groovy Guava, Purely Pomegranate
Punch: Scallop Circle Punch
Ink the stamp in the lightest color (So Saffron).
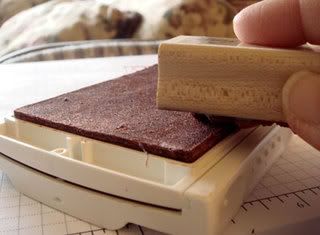
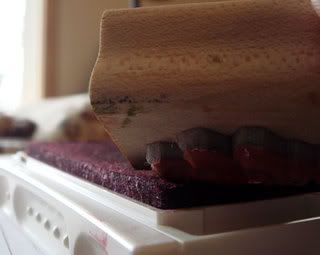
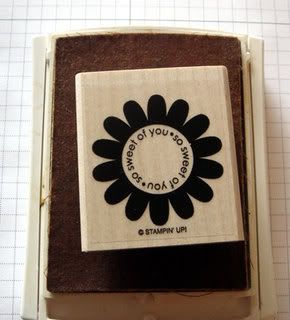
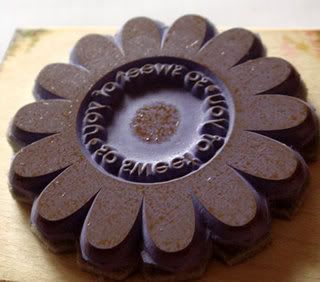
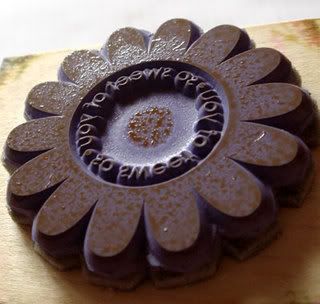
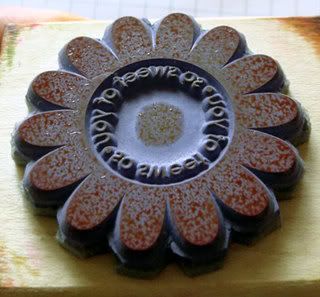
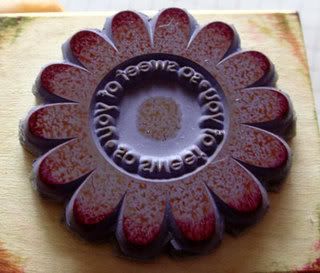
I found that when you "huff" on the stamp when doing this technique, the lighter color tends to pop more. You can see a difference on the rubber before and after I "huffed" on it.
Before:
After:
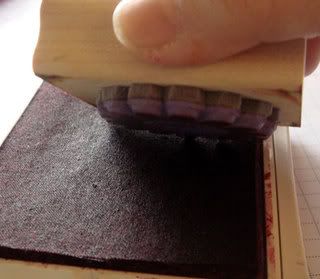
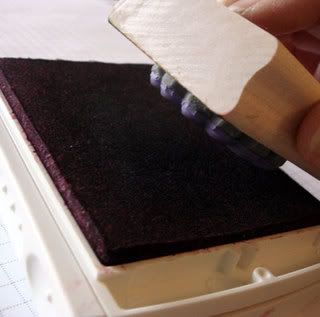
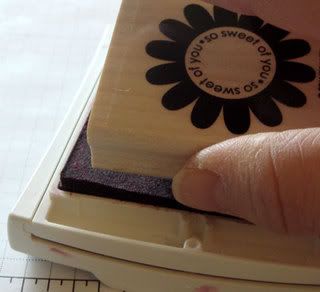
Here's how I "rock 'n roll" in Groovy Guava:
Here I "rock 'n roll" in Purely Pomegranate:
A bit hard to see the So Saffron, but it is definitely there!
Punch out the flower and the word.
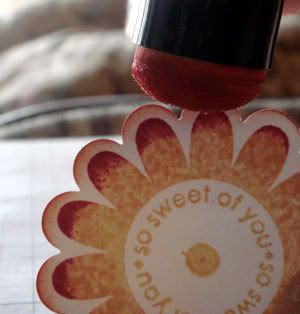
Sponge the edges with the sponge dauber to give the punched edges some dimension.
Happy Stampin'!
Wednesday, February 27, 2008
Trimming your rubber stamps
I just got asked about trimming Stampin' Up! rubber stamps.
The best pair of scissors for this job is the SU! Craft & Rubber scissors.
These scissors will cut through the rubber like butter!
Now I am very particular about the way I trim my stamps. I get in very close to my images and so I finish off the details with my Paper Snips. The thin blades of those scissors will get into the tightest of corners.
Don't forget to keep an Adhesive Remover nearby when trimming your rubber stamps. These things are so handy in taking off the gunk that accumulates on your blades.
Just a few quick swipes and you are good to go!
I just finished trimming 18 stamp sets for a few of my Japanese clients.
Here's a sample of my work:
Thank goodness that the Sale-A-Bration and Occasion Mini catalog stamp sets are all diecut!
Tuesday, February 26, 2008
Stampin' Essentials!
Every stamper has to start somewhere. We all have to have our basic supplies to get started. I have put together a list of things I think are "Stampin' Essentials" to help beginner stampers get started on making quick and easy cards!
Paper Cutter #104152 $24.95
Get one that cuts up to 12" with a swing arm that extends the trimmer to measure out to 15 1/2" wide. SU! Paper Cutter comes with 2 orange cutting blades. You can purchase a Cutting & Scoring Blade Refill pack #104154 for $5.95.
Paper Snips #103579 $9.95
These scissors are amazing! They cut into the tiniest of areas all the way to the very tip of the blade.
Anywhere Gluesticks (2) #104045 $3.95
Rectangular in shape to cover all areas of cardstock with ease. Glides on smoothly and does not dry up too fast. Easy to peel off and restick quickly before it sets. I forgot to mention... you can use it as a bone folder! You get 2 gluesticks to a pack.
Snail Adhesive #104332 $6.95
Have you ever wondered why this product is called "SNAIL" adhesive?
I joke that it looks like snail trail.
The catalog says "S-imple, N-eat, A-ffordable, In-Line", adhesive in a convenient dispenser. Whatever the definition, it is a must have!
Stampin' Dimensionals #104430 $3.95
Quick and easy way to add a little bit of dimension to your cards.
You get 3 sheets of 100 1/16" double-sided adhesive foam dots.
Adhesive Remover #103684 $1.95
When you are trimming the rubber of your stamps or using Sticky strip tape, you will notice build up on your scissors. I like to use this handy dandy material to rub off the gunk. It's also great to get rid of excess adhesive.
8-1/2" x 11" Whisper White Cardstock #100730 $7.50
or other "Neutrals" cardstocks (pg. 163) "Naturals" cardstock (pg. 166).
Pack of Colored Cardstock
The packs of cardstock can be purchased in individual colors or as a family of colors.
You can find them on pages 163 - 165.
The best start is with your favorite family of color... one that you think you will use often.
Pack of Designer Series Paper
For a quick and easy accent piece or layer, try a piece of Designer Series Paper.
They are double sided and come 12" x 12" (pg. 168 - 171)
Basic Black, Basic Brown, or Basic Gray Classic Stampin' Pad (pg. 163).
These three are waterproof... very important when it comes to coloring with markers and aquapainters. You do not want your image to smear!
Ink pads:
Collect full size Classic Stampin' ink pads ($5.95) as you go if you are going to be a serious stamper. If you are planning on being a hobby stamper, then you may want to consider a set of the Classic Stampin' Spots ($22.50) in the family color of your choice that matches your pack of cardstock.
Stamp set:
Find a stamp set that has small and large images as well as words... something that you like right away but keep going back to everytime you open the catalog. The small images are great for creating a background. The words are important for occasions.
Wheels:
Does your stamp set come with a matching wheel? If so, you may want to consider getting it so that you can create a simple background or layer with little effort and thinking.
Ribbon:
It is amazing what a little piece of ribbon can do for a card.
Not sure of what color to get? Try white!
Punch:
I think a punch is a really terrific tool to start off with, whether it's a corner rounder or a ticket punch, or a circle punch, or a scallop punch. It adds another quick and simple layer or dimension to your card. Who doesn't like quick and easy?
Stampin' Scrub #102642 $14.95
Alcohol free and lanolin free wipes will do just fine. However, the Stampin' Scrub is so simple and convenient! Just spritz, scrub on the wet side, scrub on the dry side, and put away.
Stampin' Mist Cleaner (2oz) #102394 $3.95
Lightly scented mist cleaner to help clean and condition your stamps.
Other accessories such as Stampin' Write Markers, Color wheel, brads, White Gel Pen, glitter, Aquabrush, Cutter Kit, Sponge Daubers, etc, can be added on as you learn new techniques.
I hope this helps simplify things as you get started!
Email me or post here if you have any questions!
Nihongo itsudemo dozo!
Happy Stampin'!
Jane
Monday, February 25, 2008
Build-A-Brad Workshop
That's Build-A-BRAD workshop... not Build-A-Bear workshop! lol!
I had a "Build-A-Brad Workshop" in addition to my Hostess Club workshop where I showed my ladies how easy it is to design your own brads using the rub-ons from Sale-A-Bration, since our theme this month was "Sale-A-Brate".
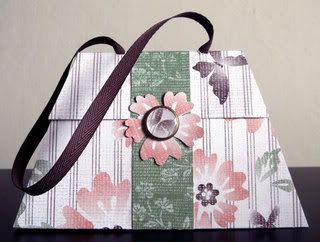
The Reversible Afternoon Tea Purse that I had posted on Saturday features a Build-A-Brad and I'm going to use it as an example to show y'all just how simple it is to put it together!
First thing to do is find an image that fits into your 1/2" circle punch (#104390 - page 180 in the catalog - punch #8). I like to use this punch to punch out the image, whether it's a stamped image, or something on your Designer Series Paper, or even on your rub-on sheets!
Side note for rub-ons:
If the image that you want is too far in on your rub-on sheet, then just use your Paper Snips to carefully trim around the other images and cut out the image you want to use. For the rub-ons, I like to use the large tip of my stylus (the one I use for dry-embossing). It's especially handy when you are rubbing the image directly onto the brad instead of onto a piece of cardstock.
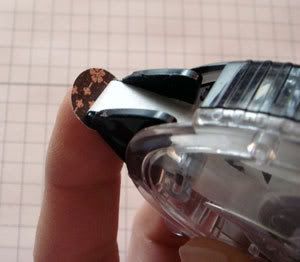
Then take your snail adhesive and dab on a bit of adhesive to the back of the cardstock. This will help keep it from moving around on your brad.
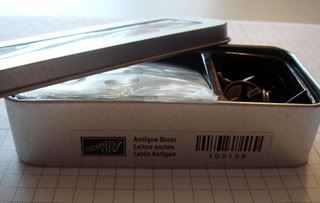
Choose your Build-A-Brad.
For my purse, I went with Antique Brass #109108.
You can also get it in Pewter #109128.
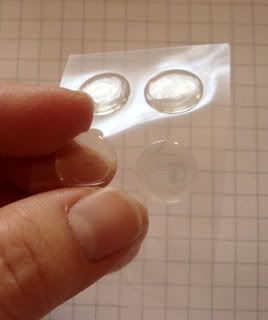
Each kit comes with 24 brad bases and adhesive acrylic bubbles.
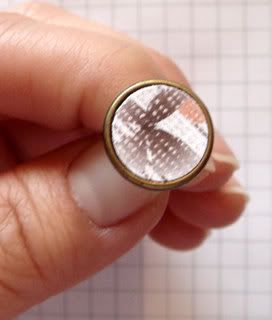
Place your punched circle on your brad.
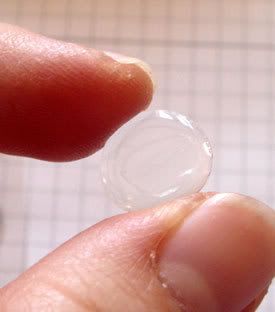
Take the top protective layer of film off the adhesive acrylic bubbles. Be very careful to pick up the bubble of your choice on its SIDE as you would a DVD or CD. If you put your finger on the sticky side, your fingerprint will be on it permanently and visible for all to see.
Very carefully place it over your image on the brad.
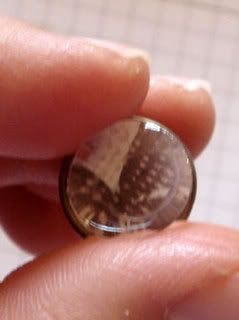
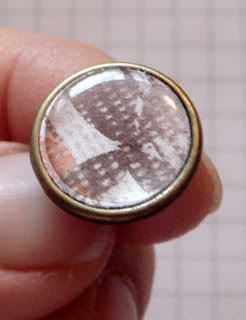
Once you have it on there, press down and you have yourself a customized brad!
They would make terrific accent pieces for your cards or scrapbook layouts.
But wouldn't they look just as cute on your jacket or on a hairband? ;)
Happy Stampin'!
Sunday, February 24, 2008
Planet Hollywood's Captain Crunch Chicken
I saw this on another SBS11 sister's blog and just had to give it a try.
YUMMY!!
Stephanie, my boys LOVE it! Thank you!
Stephanie's Planet Hollywood's Captain Crunch Chicken Recipe has an option to bake in the oven instead of frying. With my little ones playing around in the kitchen, it's much safer to bake than to fry! Thank you for that! Her recipe also has an awesome sounding Honey Mustard sauce on it. I didn't get a chance to give it a try today. My boys wouldn't touch it with a ten foot pole. I will try it sometime soon for myself though.
PLANET HOLLYWOOD'S CAPTAIN CRUNCH CHICKEN
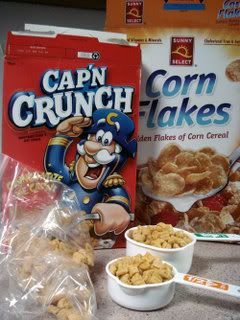
2-1/2 cups Captain Crunch Cereal - do not use the one with pink berries... unless you want pink chicken. LOL! "Ewww" is right, Stephanie!
1 cup corn flakes
1 egg
1/2 cup milk
1/2 cup flour
1 teaspoon onion powder
1 teaspoon garlic powder
1/2 teaspoon black pepper
2 pounds chicken breast, cut in 1-oz. tenders
Preheat the oven to 325 degrees
* I think this varies from oven to oven... 350 was too hot the first time in my oven.
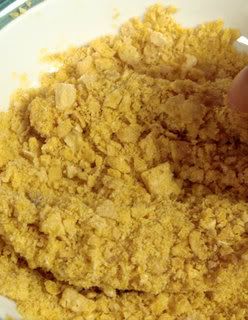
1. Coarsely grind or crush the two cereals and set aside.
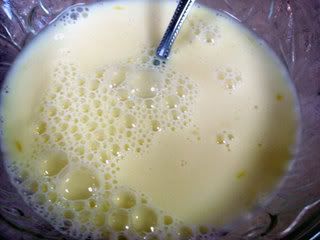
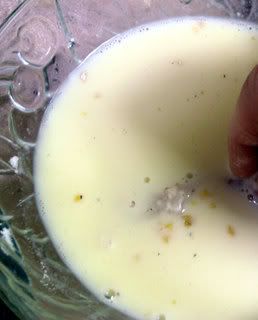
2. Beat the egg with milk and set aside.
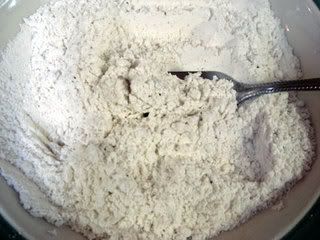
3.Stir together the flour, onion and garlic powders and black pepper; set aside
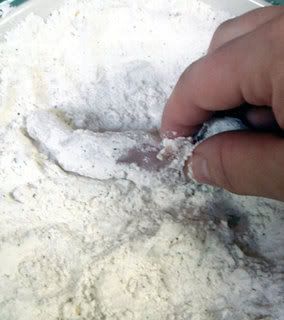
4. Dip the chicken: pieces in the seasoned flour and coat well; shake off the excess flour.
5. Dip in the egg wash, coating well.
6. Dip in the cereal mixture, coating well.
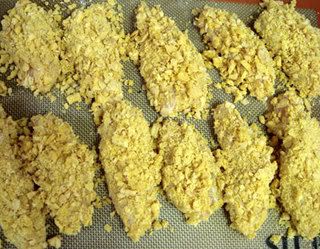
7. Place on lined cookie sheet. I used my Silpat mat. Stephanie's recipe mentions a sheet of foil. Whatever you normally use to bake your chicken tenders on will work.
Bake at 325 degrees for 15 minutes. Yield: 4 to 6 servings.
Happy cooking and bon appétit!
Jane
What lies within us
What lies behind us and what lies before us
are tiny matters compared to what lies within us.
~ Oliver Wendell Holmes ~
One of my sisters from SBS11, Veronica, decided to hold a contest for one of her altered canvases where we had to pick a number between 1 and 100. When I picked #37, I never in my wildest dream, thought it would be the lucky number. Well, it wasn't. It just happened to be the closest "lowest" number to the actual number picked, #58. lol! Oh, HAPPY day! So, I chose the above quote with green tea / mellow moss green and anything that coordinates as my colors. Everything else I left up to Veronica.
Please take a moment to visit Veronica's beautiful Ramblings and Art blog to see my new and amazing canvas! It's appropriately named "What Lies Within Us".
Thank you, Veronica!
xoxo
Jane
Saturday, February 23, 2008
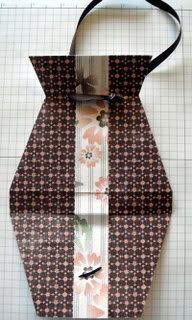
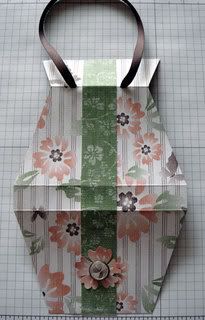
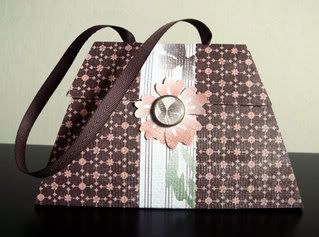
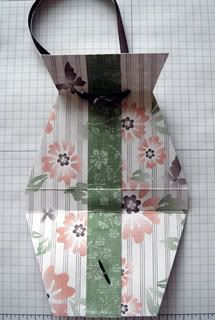
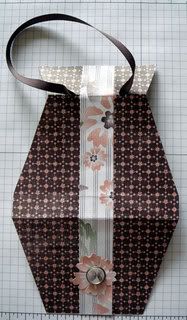
Reversible Afternoon Tea Purse!
I did it! I made a reversible purse for Carolina's Treat Purse Challenge on SCS Demo Challenges for 3D Demonstrable Projects!
You can go straight to Carolina's amazing blog, Carolina's Creative Pad for her template and instructions. I took a few pictures for those who need visuals and uploaded them as a tutorial below this post. Please note that I did improvise a little since my hobby blade is nowhere to be found. Please do not ask where it went... I nearly took apart my entire craft room looking for it at 4am and decided to work without it.
ANYWAYS...
There was this swap I had to get out of the house and so I had to focus on that first and foremost. Then I had a workshop. During the workshop, I kept thinking about the darling treat purse template and how stinkin' cute it would be to have a reversible purse.
But how would I be able to pull it off?
Think...
think...
think...
Then the light bulb went on!
Or is it the light bulb went off?
Whatever...
Here it is!!
Inside:
Outside:
All I have to do is pull the ribbon knot through to the other side, switch the brad (Build-A-Brad tutorial is coming up next!) and punched flower out, and fold the purse the other way...
Inside:
Outside:
SO... what do you think?
I will be giving it to a dear friend who loves tea. It will have a few of her favorite tea bags and a gift certificate to her favorite tea parlor.
Isn't the Afternoon Tea Designer Series paper yummy? It will be available on March 1st with the Occasions Mini Collections catalog. The ribbon is the Chocolate Poly-Twill Ribbon that will also be in the mini catalog.
Cheers!
Jane
Carolina's Treat Purse
Carolina's Treat Purse is this week's Demonstrable 3-D Project Demo Challenge over at SCS. It is just the most darling little treat purse! I have big plans for it you know. Go check out the challenge. Carolina has a template and instructions on her blog, Carolina's Creative Pad.
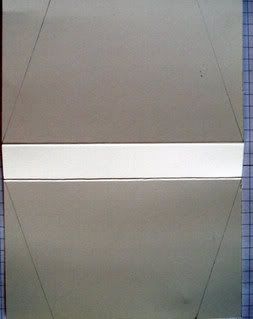
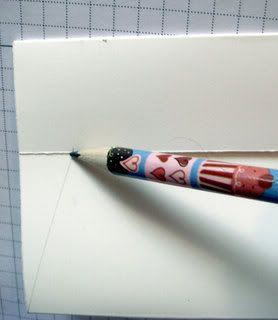
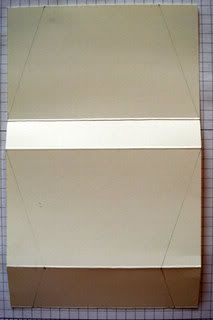
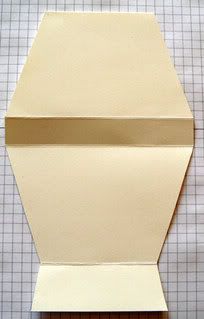
I have pictures for those of you who are like me and need visual help.
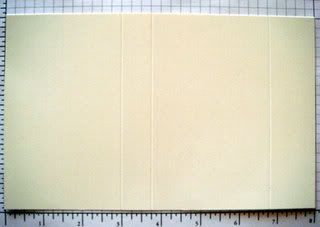
8" x 5" cardstock or Designer Series Paper
Score at 3", 3-3/4", and 6-3/4".
Carolina is on vacation in Disneyland and I had to work with the instructions a bit...
I hope you don't mind my twist on things. I have a hobby blade somewhere, but after about an hour of taking my craft bag apart in search of the thing, I decided to improvise...
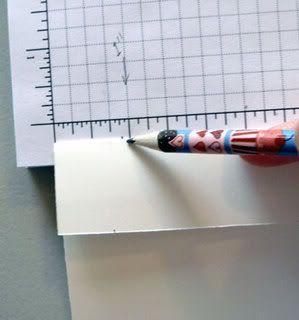
Fold the short end of the cardstock / DSP and mark the folded side on each end, measured in at 1".
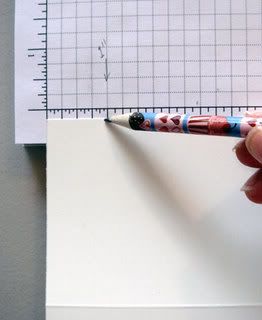
Mark large end of the cardstock / DSP, measured in at 1" on each side.
Using a straight edge and a pencil, connect the scored ends to the marks you just made.
Fold everything up and fold the flap over. Mark where the flap meets the sides of the purse.
Using a straight edge and a pencil, draw the final lines from the sides of the purse to the marked ends of the flap.
Cut out along the lines with a pair of scissors.
Decorate as you please!
Thank you, Carolina, for sharing this adorable treat purse with everyone!
Subscribe to:
Posts (Atom)